
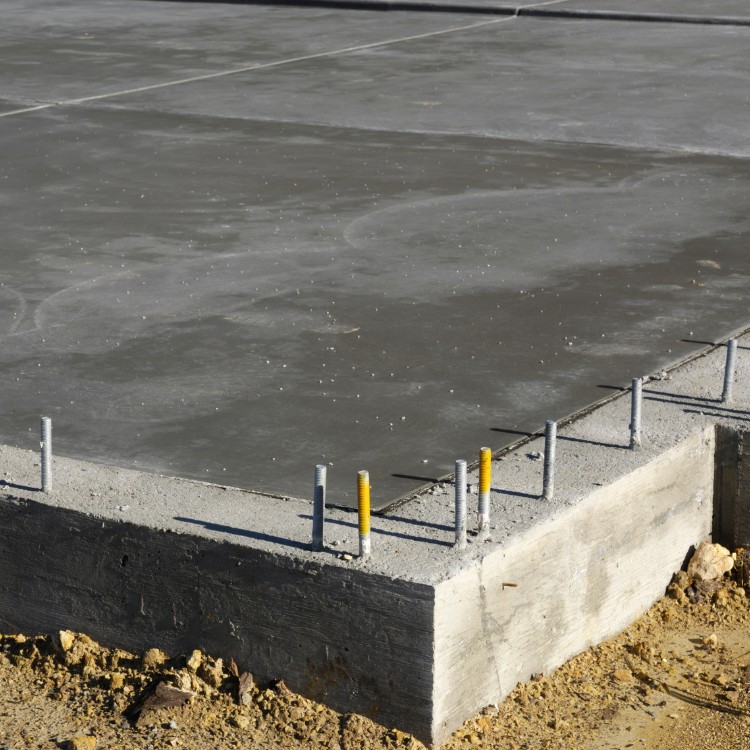
Patio Installation Inspiration: Colors, Finishes, and Patterns
A patio should feel like an outdoor “room”—a place to grill, host, and enjoy the Texas evenings. But in McKinney, we also see what happens when the foundation and drainage planning aren’t matched to the look you want. A few seasons after a pretty patio goes in, it can start to settle at the edges, develop hairline cracking, or show dark spots that never fully dry after a heavy rain.
That’s why patio inspiration isn’t just about color swatches and stamp styles. The best-looking patios are built on solid site preparation, correct grading, and a finish system that holds up to North Texas sun, moisture swings, and expansive clay soils.
Quick Answer
For a long-lasting, great-looking patio, choose a color, finish, and pattern you’ll still love in 5–10 years—but prioritize the build: proper base and compaction, correct slope for drainage, and the right concrete mix and curing/sealing plan. In McKinney, where expansive clay and intense storms are common, drainage design and foundation/flatwork coordination are what prevent early settlement and cracking.
Patio Installation Concepts That Actually Translate Outdoors
When homeowners ask for “inspiration,” they usually mean one of three things: color, surface finish, or pattern layout. Here’s how those choices work in real installs—plus what to watch for so the aesthetic doesn’t fight the performance.
Color: Earthy Tones Hide Wear Better (But Still Look Clean)
Popular patio color directions in North Texas:
- Warm greiges and tans (hide minor staining and dust)
- Richer browns (great for stamped looks that mimic brick/stone)
- Cooler grays (modern style; can show contrast in small surface variations)
- Light sand/cream (bright, but shows dirt and efflorescence more easily if drainage or curing isn’t managed)
A contractor’s observation: the patios that maintain a “fresh” look usually have a consistent mix design, controlled water/cure timing, and a sealing approach that matches the color. If water is allowed to sit on the surface or the slope is wrong, you’ll get uneven discoloration long before you see structural issues.
Finishes: Smooth, Textured, or “Grip First” for Safety
Finish affects both appearance and how the patio behaves in wet weather.
Common exterior finish options:
- Broom-finished concrete: classic, durable, good traction.
- Light broom / micro-texture: a cleaner look with less visible texture than heavy broom.
- Stamped concrete with release powder control: gives pattern depth while still providing a textured surface.
- Exposed aggregate look: hides small surface imperfections well but requires careful curing and sealing.
If you plan on adding an outdoor rug, grill mat, or furniture that gets dragged across the patio, consider finish durability. In Texas sun, some finishes can become slick if they’re too smooth and improperly sealed—especially near steps or the area closest to the door where water tracks in.
Patterns: Stamps, Borders, and Layouts That Don’t Create “Weak Spots”
Stamped patterns can be stunning, but layout matters. A pattern that looks good on paper can create joints or stress points in the wrong places if it’s not coordinated with structural movement and shrinkage.
Pattern ideas that work well:
- Random ashlar / stone-look stamps for a natural aesthetic
- Herringbone or basketweave borders to frame a seating area
- Large “field” stamp panels with clean control joints for predictable cracking
One firsthand thing we watch on every patio install: where joints land. Concrete will crack—planned control joints guide that cracking so it stays straight and “intentional.” When homeowners choose a pattern without thinking about joint placement, the surface can end up looking busier than it needs to.
Case Example (Anonymized): The “Beautiful Patio, Uneven Edges” Fix
We recently evaluated an older stamped patio replacement project where the homeowner loved the color and pattern, but the patio edges had settled unevenly after several heavy rains. The stamp work was gorgeous, but water was collecting at the perimeter because the grading pitch wasn’t consistent and the base wasn’t uniform.
The repair plan wasn’t about changing the look—it was about correcting site preparation and drainage flow, then installing with a finish plan that could handle Texas weather cycles. The result: a patio that looked the same (and better), but didn’t keep “telegraphing” the underlying soil and water issues.
What Property Owners Often Overlook (and Why It Shows Up in the Finish)
Most people focus on the visible part of a patio. But the performance problems we see in North Texas usually start under the surface.
Common Oversight #1: “It Looks Level” vs. “It Drains Correctly”
A patio can feel level to the eye and still drain poorly. Even a small pitch error can cause water to pond at low spots—leading to:
- darkened areas after storms
- accelerated wear on certain finishes
- freeze-freeze isn’t an issue in Texas, but repeated wet/dry cycles still stress the surface
Common Oversight #2: Assuming the base is “standard”
Concrete longevity is tied to base conditions: thickness, compaction, and moisture behavior. With expansive clay, base preparation and stabilization aren’t optional—if they’re rushed, the slab can move and telegraph cracks.
Common Oversight #3: Treating the patio as a standalone project
If your patio ties into other flatwork—walkways, steps, driveways, or a home with known drainage/foundation concerns—you’ll want coordination. That’s especially true when the project includes foundation grading or existing drainage corrections.
If you’re planning related work, it often makes sense to review sitework holistically, including:
foundation grading support
and any nearby flatwork changes for a consistent water management plan.
Common Mistakes That Cause Drainage Problems (and Early Concrete Trouble)
Below are the issues we commonly see when a patio looks great at install but starts acting up later.
Mistake 1: No clear slope away from the home
A good patio needs a deliberate pitch so water doesn’t creep back toward the house. This is where many “DIY-friendly” approaches fail—especially once soil settles and the patio base compresses.
Mistake 2: Skipping site preparation and compaction
Concrete doesn’t fail only because of surface wear. Many early cracking and settling patterns trace back to inconsistent base prep. In McKinney, expansive clay can expand and contract with moisture changes, making uniform compaction and proper drainage even more critical.
Mistake 3: Blocking drainage paths with landscaping or edging
Sometimes the patio is fine, but the surrounding hardscape changes later:
- flowerbeds backfilled too high against the slab
- edging installed without a plan for runoff
- downspouts redirected poorly
Mistake 4: Choosing a stamp pattern without joint planning
Stamped concrete can look “seamless,” but joints still need to be placed intentionally. When joints are treated as an afterthought, cracks can pop where you don’t want them—often across the most visible part of the pattern.
Mistake 5: Sealing too early (or skipping sealing when it’s needed)
Sealing isn’t “one size fits all,” but Texas exposure is real. Without the right plan, you may see uneven color, surface wear, and staining that’s hard to correct later.
Construction, Repair, or Maintenance Checklist (Do This Before and After Pour)
A patio lasts when the planning and upkeep match the build.
Sitework & Design Checklist (Pre-Install)
- Confirm the drainage direction: patio pitch away from the home, toward a planned discharge point.
- Review base thickness and compaction for your soil conditions.
- Decide on control joint locations early—before the stamping layout is finalized.
- Match finish choice to real use (grill traffic, foot traffic, wet areas).
- Plan for transitions: where the patio meets door thresholds, steps, and nearby walkways.
If you’re also updating other outdoor surfaces, it helps to coordinate with flatwork services like:
concrete sideway installation
or
concrete driveway installation
so slopes and water flow don’t fight each other.
Maintenance Checklist (Post-Install)
- Clean regularly: remove organic debris (leaves, mulch) promptly.
- Avoid harsh chemicals that can dull or damage surface treatments.
- Inspect joints and edges after storms—look for gaps forming or water tracking.
- Rinse and re-seal on schedule based on your sealant type and traffic exposure.
- Don’t sand or “patch over” low spots with random materials—address the cause (grading/drainage) first.
McKinney and North Texas Relevance: Why Patios Behave Differently Here
North Texas soils and weather patterns influence everything from slab movement to how finishes age.
Expansive clay + moisture swings
In McKinney and surrounding areas, expansive clay can expand when wet and shrink when it dries. That movement can be subtle, but it shows up in:
- edge settling
- uneven joints
- cracks that follow stress points
Heavy rain events
When storms hit, the patio isn’t judged by how it looks on a sunny day—it’s judged by how it drains. A small slope mistake becomes a big problem after repeated wet/dry cycles.
Summer heat exposure
UV and heat can change how sealers and surface colors age. That’s why color systems and sealing strategy matter, especially for lighter or high-contrast looks.
Contractor insight we see often
The most beautiful patios don’t fail because of the stamp or color. They fail because the water management system underneath and around the slab wasn’t aligned with the site. Fixing that later is more expensive than getting it right the first time.
Quick Recommendation: How to Choose the Right Patio Build for Your Goals
If you want a patio that stays attractive and doesn’t develop “surprise” issues, start with the build system—not the pattern.
A practical approach we recommend:
1. Confirm drainage and grading first (especially if you’ve had any foundation or water issues).
2. Choose a finish that matches your lifestyle (texture for traction, lighter colors only with the right sealing plan).
3. Build pattern layouts around control joints and expected shrinkage.
4. Plan the perimeter: edging, landscaping, and downspout discharge should all direct water away.
If you’ve noticed driveway or walkway cracking nearby, it’s worth coordinating the whole exterior flatwork plan. Depending on what you have now, you may also be considering:
- driveway replacement or repair strategies
- parking lot paving/striping updates for commercial properties
- sidewalk improvements for walkability and ADA-aligned surfaces
For example, homeowners sometimes bundle patio and driveway work to keep drainage consistent across the property:
driveways and patio drainage coordination
Optional Comparison: Concrete Patio vs. Asphalt-Like Alternatives
Patios are usually concrete, but some property owners ask about “asphalt-style” options. Here’s a realistic comparison from a performance standpoint:
| Feature | Stamped/Sealed Concrete Patio | Asphalt-Style Surface (where available) |
|---|---|---|
| Long-term appearance | Color and pattern remain strong with sealing | Can fade and soften visually over time |
| Drainage compatibility | Easy to design pitch and control joints | Can be harder to manage ponding at edges |
| Maintenance | Cleaning + periodic sealing | Repair patches and resurfacing often needed |
| Heat behavior | Solid surface, predictable traction | Can soften in extreme heat depending on system |
| Overall durability | Strong when base prep is done right | Depends heavily on installation quality |
If your priority is a clean, durable outdoor living space that blends with other concrete elements on your property, concrete is typically the most reliable route—especially when the site prep is done correctly.
Signs Concrete Needs Repair (Before It Becomes a Bigger Project)
If you’re already dealing with patio distress, here are common indicators:
- Raised or sunken sections that create tripping hazards
- Cracks that widen or show edge movement
- Water pooling after rain
- Sealer failure with flaking or widespread discoloration
- Staining that keeps returning in the same spot (often a drainage issue)
Sometimes a patio problem is actually a broader site issue. If you’re noticing settlement near other structures, it may be time to review foundation-related services such as:
concrete foundations and slab foundations
or
foundation grading services
Ready to Improve Your Property With Durable Concrete Solutions?
If you’re planning a patio upgrade—whether you want a stamped stone look, a modern color blend, or a clean broom-finished surface—start by making sure the drainage and base design match the style. That’s how you get a patio that stays beautiful through North Texas seasons, not just through the first summer.
About TopCore Concrete
TopCore Concrete provides slab foundations, retaining walls, patio installation, grading, parking lots, sidewalks, and concrete flatwork services throughout McKinney, TX and surrounding North Texas communities. The company focuses on durable construction, proper site preparation, long-term structural performance, and helping homeowners and businesses improve their properties through practical, built-to-last concrete and grading solutions.
Frequently Asked Questions
Why do patio cracks happen in Texas even when the concrete looks fine?
In North Texas, cracking often comes from shrinkage and movement—especially with expansive clay soils and inconsistent moisture conditions. Even well-finished concrete will crack, but the goal is planned control joints and a base that’s properly prepared and compacted. If you’re seeing cracks that shift or widen after rain, it usually points to drainage or base issues rather than just surface wear.
What’s the best patio finish for wet weather traction?
For many McKinney homeowners, a broom-finished or lightly textured finish provides reliable traction without feeling too rough underfoot. If you choose stamped patterns, ensure the surface remains appropriately textured and sealed for exterior conditions. The best finish depends on where the patio sits relative to doors and downspouts—wet tracking areas need extra attention.
Should I seal a stamped concrete patio?
Typically, yes—especially for lighter colors or high-visibility patterns. Sealing helps resist staining and improves surface consistency under sun and moisture cycles. The key is using the right sealer for exterior conditions and timing it correctly after installation. If drainage is poor, sealing alone won’t prevent discoloration caused by recurring water pooling.
How do I know if my patio needs more than a resurfacing or patch?
If you see uneven edges, persistent pooling water, or cracks that indicate movement, resurfacing can hide symptoms briefly but won’t fix the cause. Concrete repair works best when it addresses the underlying grading, base prep, and drainage flow. A contractor assessment can determine whether the issue is surface-level wear or a deeper site movement problem.
Can I match a new patio to existing concrete colors and patterns?
Often, you can get close, but exact matches are difficult—especially with older concrete that has aged and weathered. A better approach is to choose a complementary color palette and pattern design that looks intentional together. Coordinating the project timing and finish system (including sealing strategy) can improve consistency across adjacent slabs.